Borobudur photography tips sunrise usually means two things: where to stand and how to work with the changing light over the temple and volcanoes. This guide covers both — plus camera permits, tripods, and what is and isn’t allowed under current park rules.
Why Borobudur at sunrise is special (and slightly tricky)
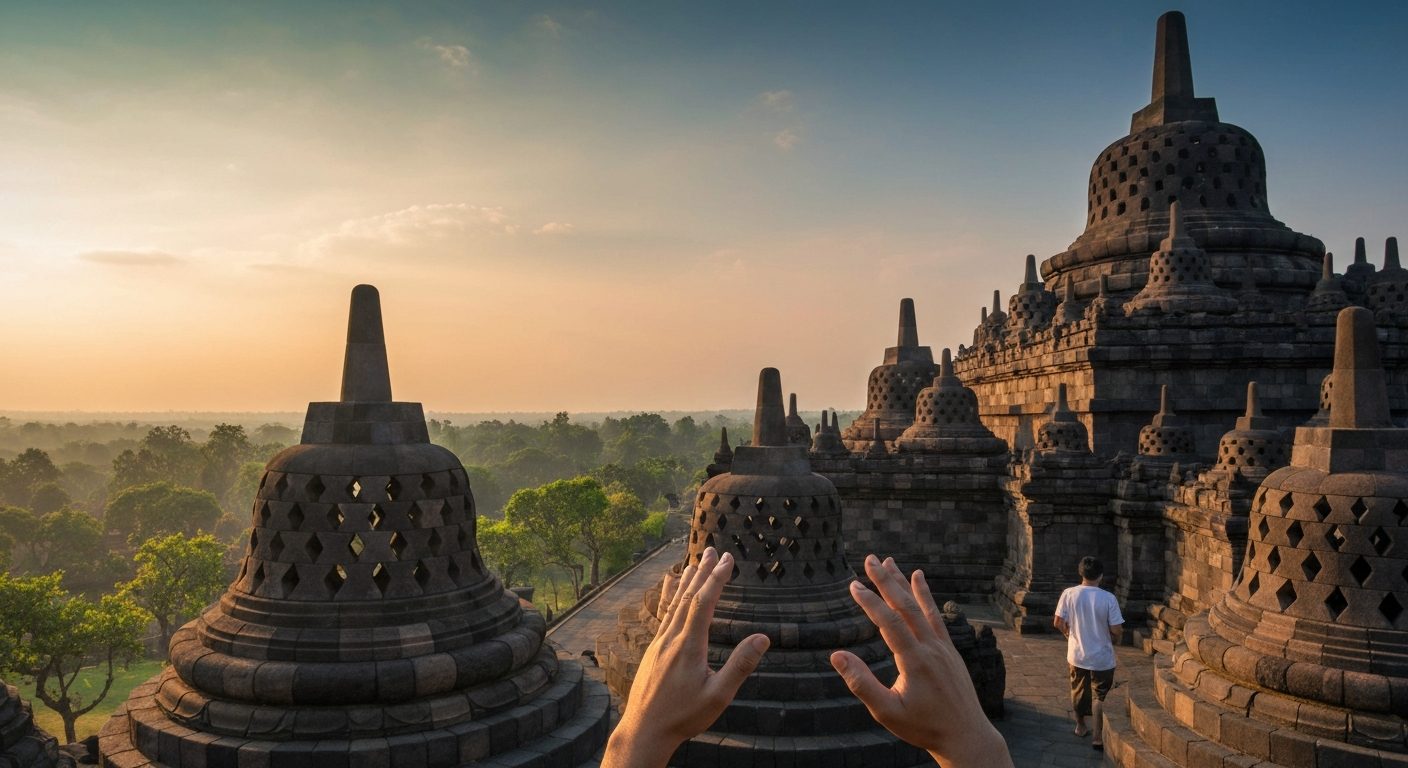
Borobudur is a 9th-century Mahayana Buddhist temple in Central Java, built by the Sailendra dynasty and now protected as a UNESCO World Heritage site. Photographers love it for three layers of subject in one frame: misty jungle, cone-shaped volcanoes like Merapi and Merbabu, and the stone stupas and Buddha statues of the upper terraces.
The “tricky” part:
- The temple area sits in a basin that traps mist.
- The best color often happens before the sun clears the ridges.
- Access times, tripod rules and where you are allowed to stand change with conservation policies.
From our side at Borobudur Tour From Bali (operated by Bali Premium Trip), we do two things:
- Help you be in the right place at the right time.
- Make sure what you carry in — camera, tripod, drone — fits the current regulations managed by Borobudur Conservation Office and PT Taman Wisata Candi.
We arrange licensed local guides, sunrise hill access and permits where needed, but we don’t set the regulations. Those come from the site authority and can change; you should always confirm the latest at the ticket office or by asking your guide on the day.
Sunrise choices: hill view vs on-site temple access
You’ll often hear two ideas discussed together: “Borobudur sunrise photography workshop tour” and “Borobudur temple sunrise ticket”. In practice there are several distinct options.
Here is a quick comparison to help you choose, especially if you’re planning a private sunrise slot from Bali or Yogyakarta.
| Option | View type | Typical access time | Tripod friendliness | Indicative extra cost* (IDR / USD) |
|---|---|---|---|---|
| Punthuk Setumbu (Setumbu Hill) | Distant silhouette of Borobudur + volcanoes above mist | Gate usually opens around 04:00–04:30 | Good, space dependent on crowd | ~IDR 40,000–100,000 (about US$3–7) |
| Other village hills (e.g. Gereja Ayam area) | Varied angles on temple + ridges | Similar pre-dawn openings | Good but often more walking | ~IDR 40,000–100,000 (about US$3–7) |
| Borobudur temple compound – regular hours | Ground-level compositions, reliefs, lower terraces | Morning entry usually from 07:00 onwards | Small tripods/monopods sometimes restricted | Included in regular entry; camera allowed |
| Borobudur temple – upper terraces access** | Close-up stupas, Buddha statues, volcano backdrops | Timed slots after opening hours start | Tripod rules tighter; check on the day | Top-up fee for limited-capacity access |
| Professional / commercial shoot | Pre-agreed angles, sometimes special timings | Case-by-case permit | Usually stricter; sometimes dedicated zone | Project-based permit fees (often US$200+) |
*Indicative public ranges, last verified June 2026. Exact published rates depend on nationality, day of week, and current park policy.
**Upper-terrace access has been quota-controlled for conservation; tickets are limited per session and often sell out in advance.
From Bali, your day usually starts the previous evening:
- Flight Denpasar (DPS) to Yogyakarta (YIA or JOG): about 1 hour 10 minutes flight time.
- Drive from Yogyakarta to Borobudur area: usually 1.5–2 hours depending on traffic (about 40–60 km).
We plan these connections so you reach your chosen sunrise point in time without rushing. From Yogyakarta, departure for Punthuk Setumbu is typically around 03:00.
Punthuk Setumbu: the classic “temple in the mist” viewpoint
What this hill actually gives you
Punthuk Setumbu (often called Setumbu Hill) is a low ridge west of Borobudur. From the viewpoint you see:
- In the foreground: layered trees and village roofs.
- In the middle distance: Borobudur’s silhouette emerging from the fog.
- Behind it: Merapi and Merbabu volcanoes catching the first light.
If you want the classic “Borobudur in a sea of mist” shot, this is your best chance. You will not see the reliefs or close-up stupas from here; it’s all about shape and atmosphere.
Timing the mist-and-backlight window
The best Borobudur sunrise mist light photography tips from this spot come down to three windows of time:
- Blue hour (about 30–45 minutes before sunrise)
- Sky: deep blue to purple.
- Mist: dense and low, the temple is often only a faint shape.
- Use: silhouettes, long exposures, starbursts from village lights.
- Pre-sunrise color (10–20 minutes before sunrise)
- Sky: orange, magenta and cyan layers.
- Mist: lifting a bit, temple outline more defined.
- Use: classic “postcard” compositions with layered ridges and trees.
- First light on Merapi and the temple (0–20 minutes after sunrise)
- Sky: brighter, less color but more detail.
- Mist: thinning; some mornings it glows, others it burns off quickly.
- Use: more dynamic range, possible sunstar if clear.
You cannot control the mist. Some mornings it is too thick, some mornings very little. What you can control is arriving early — we aim to reach the top 45–60 minutes before sunrise so you can pick a spot and adjust to the light.
Suggested settings: hill viewpoint (DSLR / mirrorless)
Use these as a starting point, then refine for your camera and taste:
- Lens:
- 24–70mm zoom gives flexibility.
- 70–200mm helps isolate Borobudur and volcanoes through the mist.
- Mode: Aperture Priority (A/Av) or full Manual.
- Aperture: f/5.6–f/8 to keep trees and volcanoes sharp enough.
- ISO:
- Blue hour: ISO 800–1600.
- Pre-sunrise color: ISO 400–800.
- After sunrise: ISO 100–400.
- Shutter speed (guideline):
- Aim for 1/60–1/200 sec if handholding at normal focal lengths.
- If using long lenses, try to stay at 1/(2 × focal length) or faster (for 200mm, ~1/400 sec).
- White balance:
- Auto, shoot RAW and adjust later. Or
- “Cloudy” to warm up the colors a bit.
- Stabilisation:
- On, if handholding.
- If on a tripod, turn in-lens or in-body stabilisation off to avoid micro-blur.
Can you use a tripod on Punthuk Setumbu?
In general, yes — small to mid-sized tripods are usually accepted on the hill viewpoints. The ground is uneven and spaces can be tight at busy periods, so:
- Keep legs narrow and don’t block paths.
- Use a compact travel tripod, not a huge video rig.
- Listen to any instructions from the local caretakers; they manage crowd flow.
From our side, we flag your tripod use in advance with the local team, but the final say always rests with the people running the hill on the day.
Borobudur from inside the park: reliefs, stupas and compositions
Understanding the temple layout for photography
Borobudur is built as a step pyramid with:
- 6 square lower levels (with narrative reliefs).
- 3 circular upper terraces (with perforated stupas).
- A central dome (now largely symbolic as the original top has been reconstructed).
The lower levels are rich in stories from the life of the Buddha, Jataka tales and everyday life in 8th–9th century Java. The upper levels express a more abstract, meditative space.
From a photography point of view:
- Lower levels: detail work — reliefs, stone texture, staircases, pilgrims.
- Upper terraces: iconic stupas with volcano backdrops, if you have access.
Current access and footwear rules
Recent conservation policies (as of June 2026) have:
- Restricted the number of visitors allowed onto the upper terraces per day.
- Introduced timed sessions and quota-controlled tickets.
- Required visitors allowed on the monument’s upper levels to wear special soft sandals provided on-site to protect the stones.
These policies can tighten or relax over time. We arrange tickets and slots based on the park’s published system, but we cannot override quotas.
Comfort tip: bring socks. Stone + early morning + thin protective sandals can feel cold.
Best on-site composition ideas (including “Instagram” shots)
Here are practical borobudur instagram photos locations composition ideas that work well for most visitors:
- Stupa + Merapi alignment (upper circular terraces)
- Position yourself so one of the larger stupas frames Merapi in the background.
- Use a low angle to emphasize the bell shape against the sky.
- Settings: 24–35mm, f/8, ISO 100–400, watch for clipped highlights.
- Buddha through stupa lattice
- Some stupas contain Buddha statues that are partially visible through diamond-shaped holes.
- Focus through a single hole, let the lattice blur.
- Settings: 50–85mm, f/2.8–f/4 for shallow depth of field.
- Long corridors of reliefs (lower square terraces)
- Use the repetitive pattern of walls and niches to lead the eye.
- Place a human subject (ideally in respectful dress) at the vanishing point.
- Settings: 16–24mm wide angle, f/8–f/11.
- Candhi (small stupas and shrines) against the sky
- Silhouette small stupas by exposing for the sky.
- Works best on days with textured cloud.
- Detail story panels
- Photograph specific relief scenes such as sailors, dancers, or village life.
- Shoot at a slight angle to show depth, not flat-on like a photocopy.
For Instagram-style images, keep two priorities:
- Respect: do not climb on stupas or statues, and avoid sitting directly on Buddha statues.
- Space: step aside quickly after a shot; many visitors want similar angles.
Suggested settings: inside the temple complex
Lighting shifts quickly here, because the terraces create deep shade and bright edges.
- Lens kit idea:
- 16–35mm: architecture and context.
- 35–85mm: portraits, detail, relief panels.
- Morning light (around 08:00–09:00):
- ISO 100–400.
- Aperture f/5.6–f/8 for most scenes.
- Shutter speeds 1/125–1/500 sec.
- Inside corridors and shaded reliefs:
- ISO 800–1600 if needed; modern cameras handle this well.
- Aperture f/3.5–f/5.6.
- Keep shutter above 1/60 sec to avoid blur.
- Tripod use inside: more on this below, but assume you will usually be handholding.
Camera, tripod and professional permit rules (what we see in practice)
Many guests ask us for borobudur photography tips camera tripod permits because they hear mixed messages online. The park rules come from two overlapping bodies:
- Borobudur Conservation Office (heritage and preservation).
- PT Taman Wisata Candi (visitor management and ticketing).
Our role is to translate their published policies into plain-language expectations, then help you secure any required permissions. We always check the latest rules again shortly before your visit.
Regular visitors: what you can usually bring
For non-commercial visits, as of June 2026 the broad pattern has been:
- Allowed without special permit:
- DSLR/mirrorless cameras.
- Compact cameras.
- Smartphones and action cams.
- Sometimes restricted or questioned:
- Large tripods and light stands.
- Big video rigs or gimbals.
- Definitely regulated:
- Drones.
- Commercial filming / advertising shoots.
- Large group workshops that look like a formal class.
Security staff and guides may use discretion. If your setup looks like a full movie crew on a regular ticket, expect questions.
Tripods: hill vs inside the monument
In short:
- Hill viewpoints (Punthuk Setumbu, etc.)
- Usually tripod-friendly. Bring a small to mid-sized travel tripod.
- Local staff may ask you to adjust position for safety and other guests.
- Inside Borobudur temple compound
- Small tabletop tripods and monopods are often tolerated.
- Full-height tripods can be restricted, especially on busy days, narrow passages, or upper terraces where crowding and stone protection are major concerns.
- Security may ask you not to set up in the middle of walkways or on the fragile stone floors.
We advise guests:
- Be prepared to shoot handheld; modern cameras at ISO 800–1600 do well.
- If you must use a tripod for a particular shot, ask your licensed local guide to check with staff on-site first, then work quickly and discreetly.
Professional / commercial borobudur photography permit
If you are shooting:
- A commercial campaign.
- A documentary.
- A stock image series for sale.
- Any project with models, props, or brand logos.
…you should not rely on a regular visitor ticket.
You will need:
- A written application describing your project, crew size and equipment.
- Proposed dates, times and locations (including any off-hours requests).
- A permit from the Borobudur site management, possibly including conservation review.
From recent projects we’ve supported, realistic expectations are:
- Fees often start around a few million rupiah (roughly US$200–400) and can go much higher depending on usage, scale and requested access.
- Processing can take several working days or longer, especially if your dates fall near national holidays.
- You may be assigned an on-site liaison or ranger.
We can assist with introductions and translation of your request, but final approval and fee-setting are entirely in the hands of the site management.
Is drone photography allowed over Borobudur?
Many people ask directly: “borobudur drone photography allowed or not?”
The safest assumption is no, unless you hold:
- A written permit from the temple management / conservation authority.
- Any additional authorisations required under Indonesian aviation regulations for drone flights.
Reasons are simple:
- Safety of visitors.
- Protection of the stone structure and sensitive areas.
- Respect for the temple’s function as a religious site, not just a panorama backdrop.
Even if you hold a general Indonesian drone licence or are experienced, that does not automatically grant permission to fly over this UNESCO site. Penalties for unauthorised flights can include confiscation of the drone and fines.
If you strongly wish to attempt a borobudur temple aerial view sunrise shot:
- Contact us well in advance via plan your trip and mention your drone model, purpose and sample portfolio.
- We can ask the relevant offices whether a special permit is even being considered for your dates.
- Be prepared for the answer to be no; current policy has been conservative.
Never launch a drone from surrounding public roads or village fields pointed at the temple without clear written permission — enforcement covers the wider airspace, not only inside the ticketed area.
Practical etiquette: dress, movement and respect in shots
Photography at Borobudur is not only about the image; it is also about how you behave in a living religious landscape.
Dress code that also photographs well
Standard respectful guidelines:
- Shoulders covered (t-shirt or light shirt).
- Shorts or skirts at least knee-length.
- Avoid offensive prints or slogans.
The site sometimes offers sarongs or cloth wraps when needed. For photos:
- Solid, muted colors work better than loud logos.
- Avoid white shirts at sunrise on the hills — they can blow out easily in images.
- Neutral earth tones (olive, beige, dark blue) photograph nicely against grey stone and green trees.
Poses and actions to avoid
The management and local community appreciate:
- No standing or sitting on stupas or Buddha statues.
- No climbing onto railings or dangerous edges for dramatic poses.
- Limited “yoga on the stupa” or similar postures; this has been publicly discouraged in past seasons.
If in doubt, ask your guide: “Is this okay?” We brief our guides to be frank about what the temple staff will consider disrespectful, and to suggest alternatives such as standing beside, not on, key features.
Sample camera setups for a full Borobudur sunrise session
To make all of this more concrete, here is a sample “day in the field” flow using common gear. Treat it as a template, not a script.
Option A: From Yogyakarta – Hill sunrise + temple visit
- 01:30–02:00 – Pick up in Yogyakarta.
- 03:00–03:15 – Arrive near Punthuk Setumbu, short hike up (10–20 minutes, moderate).
- 04:30–06:00 – Shoot sunrise sequence on the hill.
- 06:30–07:00 – Simple breakfast stop in village.
- 07:30–10:00 – Visit Borobudur temple compound.
Suggested gear:
- Body 1 with 24–70mm lens for general coverage.
- Body 2 with 70–200mm lens for compressed layers and volcano close-ups.
- Spare batteries (the humidity and long on-time drain faster than usual).
- Lens cloth — morning mist + fingerprint is a common frustration.
Option B: From Bali – Overnight + sunrise then onward
- Afternoon Day 1 – Fly DPS to YIA/JOG, transfer to hotel near Borobudur (many are 5–15 km away; drive 10–25 minutes).
- 03:00 Day 2 – Depart hotel to chosen sunrise spot.
- Post-sunrise – Temple visit, then return to Yogyakarta for an afternoon / evening flight to Bali.
Indicative cost range for a privately guided 2-day Bali–Borobudur combo, arranged through our team, is often in the region of US$350–700 per person (last verified June 2026) for 2–6 travellers sharing, excluding long-haul flights, with variation due to hotel choice, domestic flight class, and how many private add-ons (jeeps, extra sites, etc.) you include. These are not fixed quotes; our reservations team prices based on your exact dates and group size.
If you’d like help matching your photo goals to a realistic plan and budget, you can plan your trip with us via email or WhatsApp. Tell us your gear, fitness level and must-have shots; we’ll respond with simple route options and where a private guide makes a real difference.
Reading the light: simple field checklist
To close the core borobudur photography tips sunrise section, here is a quick mental checklist we use on our own field runs:
- Sky first
- Check cloud cover on arrival. High thin clouds = soft color; clear sky = strong contrast; heavy low cloud = moody silhouettes rather than pastel color.
- Mist level
- Is the temple fully hidden, half showing, or already clear? Adjust expectation: abstract layers vs detailed landscape.
- Foreground
- Include trees, people or railings to anchor the frame. Pure sky + silhouette can feel empty if overused.
- Histogram
- Glance at it. Borobudur sunrise scenes often fool the meter; better to expose for the highlights and pull shadows later.
- Respectful timing
- Make your frames, then step aside. Pilgrims and other visitors are also here for their own experience, not just as “extras” in your shot.
A local guide who knows both the photography angles and the cultural etiquette smooths all of this out in real time. Our role from Bali is to match you with those licensed guides, line up the permits and tickets, and keep the logistics boring so your images don’t have to be.
If you’d like a sunrise slot planned around your camera, not the other way around, reach out to our Bali Premium Trip reservations team to plan your trip. WhatsApp is often the fastest way to fine-tune pick-up times, flight options and where to stand on Day 1.
FAQs: Borobudur photography, sunrise and permits
Do I need a special permit to photograph Borobudur for personal use?
No. For normal visitors shooting for personal memories or social media, a regular entry ticket is usually enough. Professional or commercial projects, including ads and large workshops, do require a dedicated Borobudur photography permit from the site management.
Can I do a formal sunrise photography workshop tour inside the temple?
Large, structured workshops with many tripods and students are treated differently from casual guiding. Group workshops generally need prior approval and may face restrictions on class size and where they can stand. Smaller private groups with one licensed guide and a few photographers are more easily accommodated during regular visiting hours.
Is sunrise access to the upper levels of Borobudur guaranteed?
No. Access to the upper terraces is quota-controlled for conservation and runs in timed slots that can sell out. Sunrise access from inside the compound has been tightened in recent years, and policies can shift. We check the current system before booking and will tell you frankly if sunrise from the temple itself is not available for your dates.
Are drones allowed for a quick aerial shot if I stay outside the park fence?
No. Drone restrictions apply to the airspace around the monument, not just inside the ticket gates. Flying a drone near or over Borobudur without explicit written permission from the authorities is considered a violation and can lead to confiscation and penalties.
What is the best single spot for Borobudur sunrise photography?
For a distant, atmospheric view of the temple and volcanoes above the mist, Punthuk Setumbu is the most reliable choice. For close-up stupas and reliefs in softer morning light, timed access to the upper terraces during early regular hours is best. The stronger option for you depends on whether you prefer landscape layers or intimate architectural detail.